Hi,
I bought Lisa 2/5 a couple of weeks ago, in battery damaged and non-working condition. Came with a Profile and a Lisa keyboard but no mouse, unfortunately. Will have to get the original Lisa mouse at some stage.
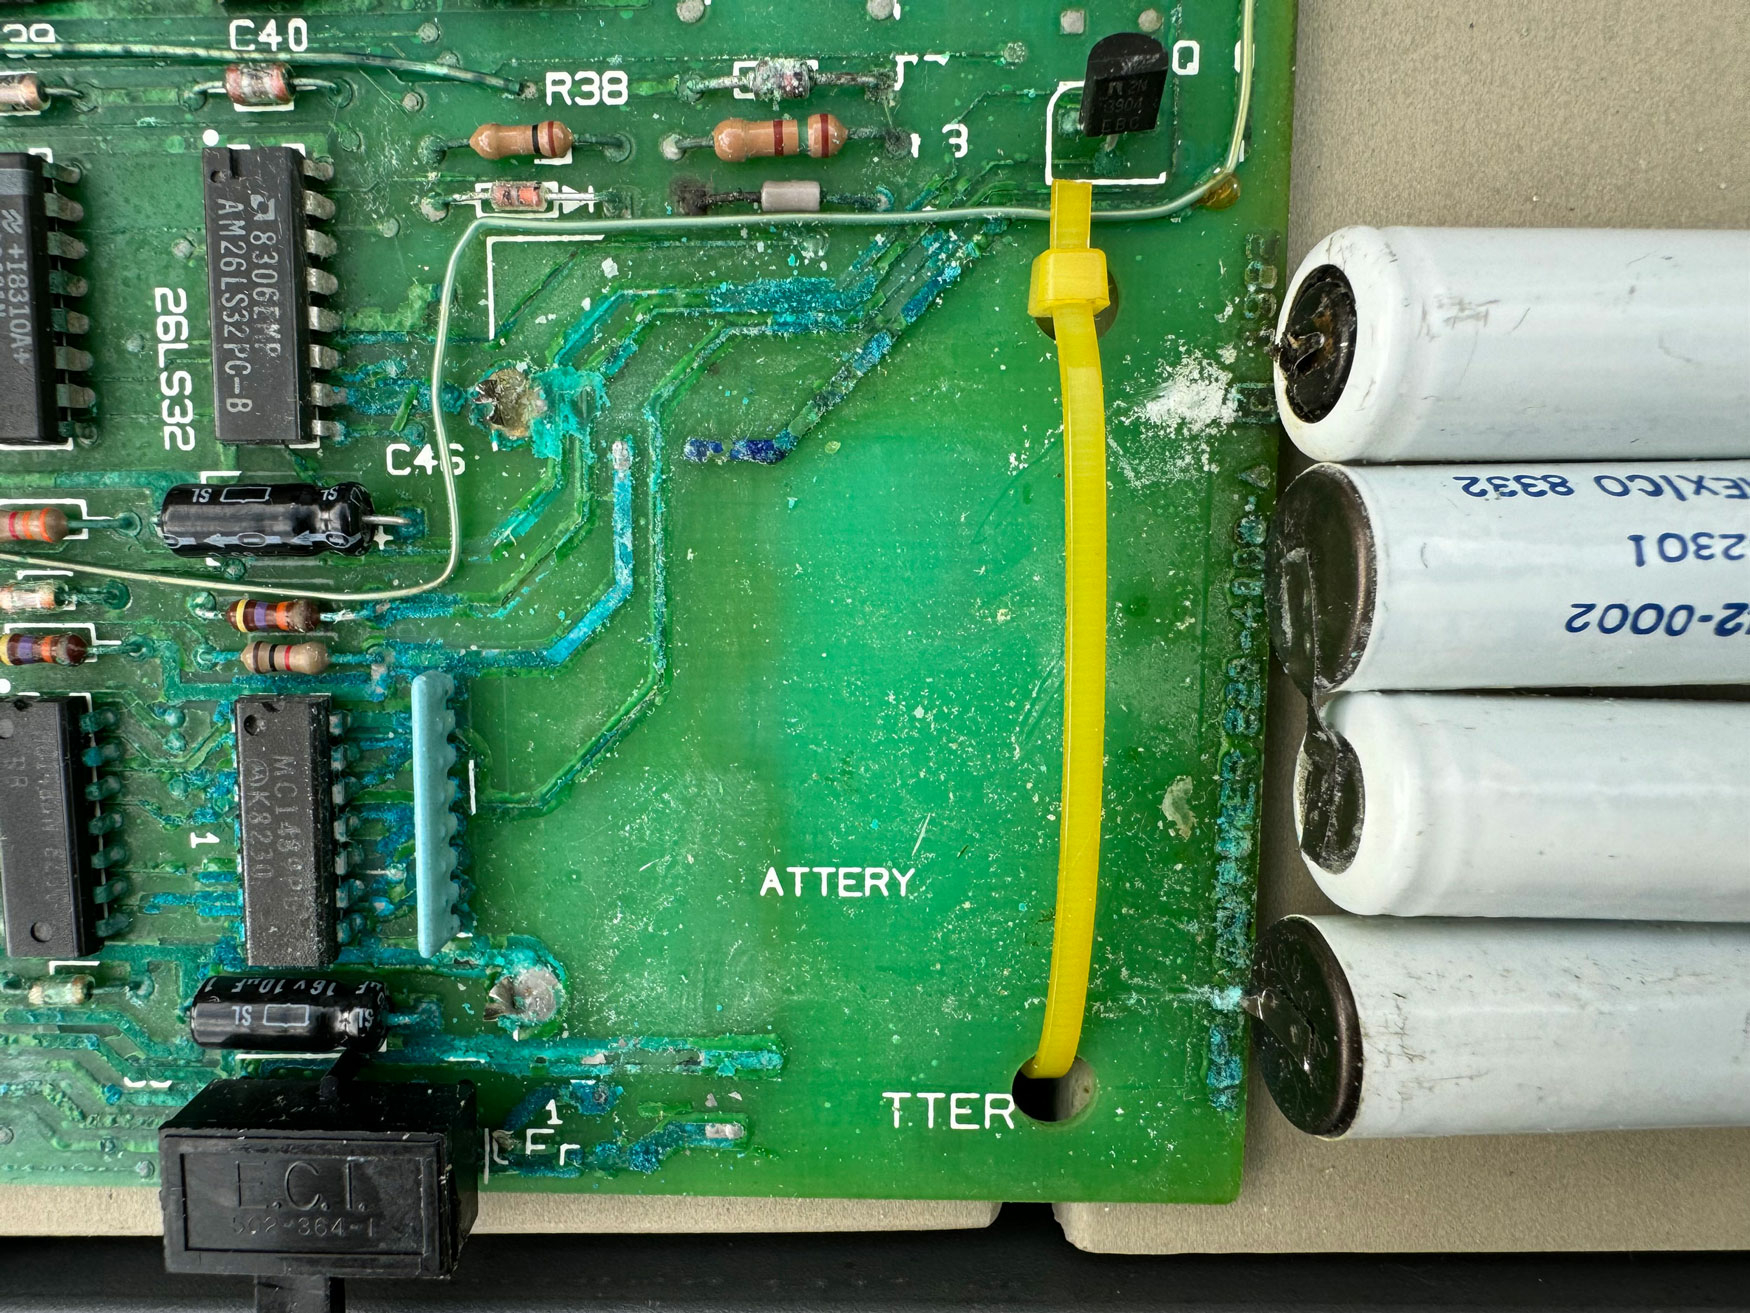
Not surprisingly, the I/O board and the motherboard have quite a bit of battery leak damage, inflicted over 40 yrs. I started with restoring the I/O board first.
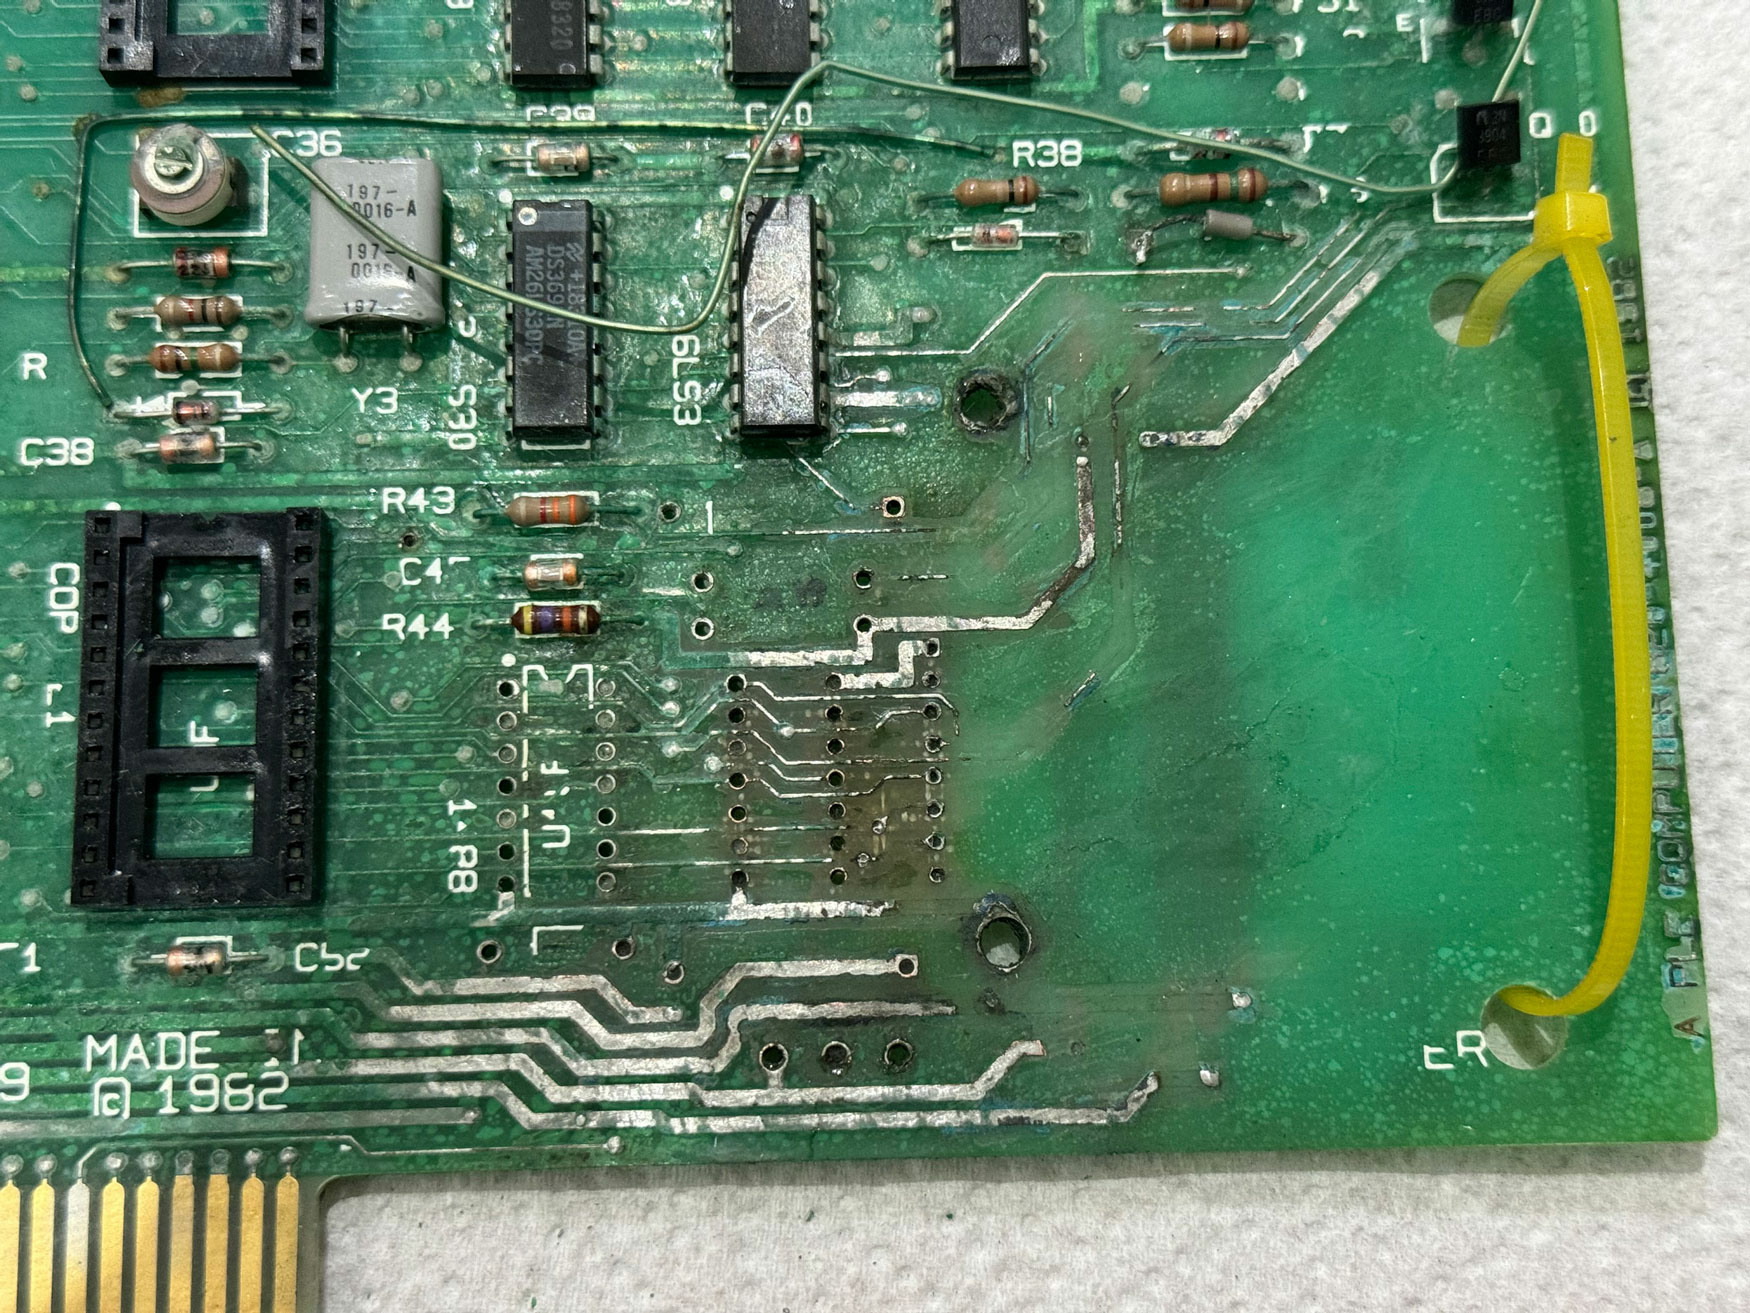
I soaked the damaged area with diluted vinegar (50/50 water/vinegar) for about 30 mins and brushed with toothbrush. It somewhat helped but there was still a lot of green corrosion left over so I started with the fibreglass pen to remove the remainder. Quickly I realised there was too much corrosion to deal with a fibreglass pen, so I used a craft knife to gently scrape the big chunk of the corrosion off and then used the fibreglass pen. Many traces around the battery were completely corroded away.
I also had to remove some components to check the traces under them. It was rather difficult to remove the chips as the old corroded solder just didn't want to melt. I am glad I did though, as the traces under one of the chips also have been corroded away. This is going to be a bodge wire fix nightmare.
Luckily the back of the board is not as bad as the front.
One thing I am puzzled about is, when I scraped away the solder mask to expose the traces that look damaged, I was expecting to see copper, but they were dull tin coloured. And when I tried tinning them, the solder doesn't seem to stick even if I use plenty of flux. Is it usual to see tin coloured traces?


From the appearance of the traces on the back ("wrinkled"), you can tell that this board is from the era when wave soldering flowed up under soldermask. The tin color is 60/40 tin/lead solder.
If you can't get 60/40 solder to wet to it, it must still be heavily oxidized. You may need a more active flux or more aggressive cleaning.
One cleaning tool that can be useful in these situations is an abrasive rubber "bullet" attachment for a rotary tool.
Thank you for the tip. I was using lead free solder but will get some 60/40 solder and try again. Also thank you for explaining the old wave soldering era that had solder getting under the solder mask. I wondered why there are so many old PCBs with wrinkled solder mask over thick traces. Now I know.
Was the solder getting under solder mask by design or because of lack of good technology?
I don't know the reasons for the different behaviors of wave soldering under soldermask, but I think you're right that the formula for the soldermask itself changed from a more plastic material to a harder adhering one. The reason for that could be a result of new material developments, regulatory changes, feedstock shortages, etc. No idea. Some makers of Apple I clones have spent a lot of time trying to purchase the "old" type of soldermask for more authentic-looking boards.